Shrove Tuesday Pancakes – A Bonus Recipe

IMG_9578

This past Tuesday was Shrove Tuesday, also known as Fat Tuesday.  When I met first met my husband, he talked about Shrove Tuesday and Shrove Tuesday pancakes.  He told me stories about eating them for dinner each year.  This was totally foreign to me.  I had no idea what he was talking about and had never heard of this “holiday.”  Growing up, his family always celebrated Shrove Tuesday as an English tradition.  It was something they did for fun and looked forward to year after year.

My sister-in-law, Amy, was kind enough to be a guest blogger and to share the traditional Shrove Tuesday Pancake recipe passed down through their family.  Rather than this being a recipe and history of my Grandma Dora’s, it’s an old one of another important family to me, the one that I married into.

Enjoy!  Wendy

Shrove Tuesday Pancakes – Written by Guest Blogger, Amy.

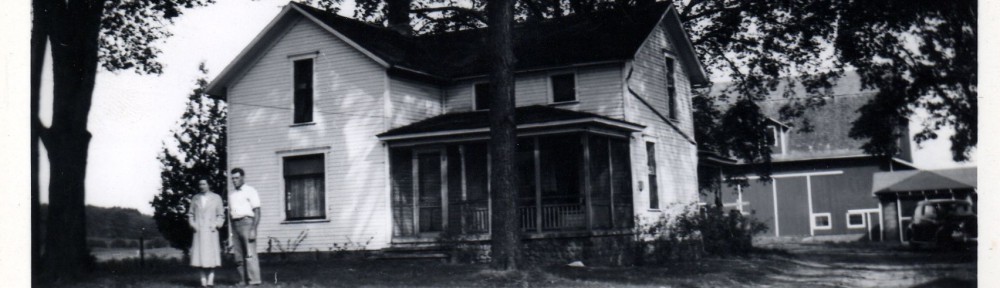
Our great-great-grandfather, Frank, came to America 1874, in search of a better life than he had known as a member of the working class in England. He spent eight years working for his uncle and cousins, until he could pay back the money his uncle had loaned him for his passage to America and earn enough money to buy his own farm land. In 1892, he married a young Baptist woman named Lemira. They attended the local Baptist Church, but Frank maintained his membership with the Church of England.

In 1900, tragedy struck when Lemira died suddenly and unexpectedly at the young age of 28. Frank was devastated and knew their four small children needed a woman to care for them, so he wrote to his sister in England and asked her to come. Fanny, whom the children always called “Auntie,” gave up everything she knew in England to live with her brother’s family and help him raise his children.

Auntie

“Auntie,” who passed down our Shrove Tuesday traditions.

Most of our family traditions came with Auntie from England. I assume the Shrove Tuesday tradition was originally part of their commitment to the Church of England. The idea was to use up ingredients that could not be eaten during the season of Lent. For us, it was just a fun family tradition.

Shrove Tuesday Pancakes

  • 6-8 eggs
  • 2 cups milk
  • little salt
  • flour, enough to make a thick batter

Fry in oil skillet.  Cook until the edges have bubbles and are light brown, then flip until the other side is light brown.  Serve with lemon, lime or orange juice and sugar.  You can use syrup if you prefer.

IMG_9521I gathered the ingredients and got to work.

IMG_9538I used 8 eggs and started by beating them with the two cups of milk. Great Grandma always used a fork instead of a whisk, so that’s what I did. I then added the pinch of salt and the flour, mixing in one cup at a time. After adding about 3 1/2 cups of flour, it seemed to be the right consistency. It should drip off the end of the fork, but not be runny.

IMG_9563I heated a small amount of oil in my electric frying pan and used a ladle to scoop the batter into the frying pan.

IMG_9551You’ll know it’s time to flip the pancake when it gets a little bubbly and you can see the edges beginning to cook. When you flip it, the side that has been cooking should be light golden brown.

IMG_9547
The edges curled upward slightly, so I pushed them down with my spatula to make sure they were getting cooked in the oil. When the bottom side also looked golden brown (I usually had to peek a couple of times), I took the pancake off the heat.

IMG_9576Traditionally, we would sprinkle the pancakes with sugar and then squeeze lemon juice or orange juice over them. A few of us – I won’t name names – used to cheat and use syrup.

IMG_9578That’s all there is to it! This recipe made 8 big pancakes, which was enough to feed my family of four with one pancake left over.

I hope you enjoy a tradition that my family looks forward to each year.  Try it and it may become a favorite of yours too!

Happy Cooking!

Amy, Guest Blogger and sister-in-law of Wendy.

Chocolate Peanut Clusters

Grandpa Grandma Dad

Grandma Dora, Grandpa and my Dad in the yard on their farm.


My Grandpa was quite a bit older than my Grandma Dora, about ten years her senior. He had probably decided he was going to be a bachelor for life before he met and fell in love with Grandma. They had grown up so differently. She, an only child, raised in town, not having to worry about where the next meal would come from. Grandpa, one of the five children, who had to be “farmed out” to family and friends to be raised after his mother died because his father couldn’t do it on his own. Their backgrounds didn’t matter though. What they had, was faithful love for each other, with God at the center of their relationship. What a wonderful example they set.

They chose the difficult life of dairy farming and while they didn’t have much, they did what they could to make holidays special. Purchasing a few things as they could, but making many things homemade. I’m sure Grandma Dora made this recipe for Chocolate Peanut Clusters for Grandpa for Valentine’s Day. I can picture her candies in a simple metal tin with a red, cloth ribbon around it.

Candy8

Candy9

Chocolate Peanut Clusters

  • 1 – 3 oz package chocolate pudding mix
  • 1 cup sugar
  • 1/2 cup evaporated milk
  • 1 Tablespoon butter
  • 1 cup salted peanuts
  • 1 teaspoon vanilla

Combine first four ingredients in heavy pan.  Cook over medium heat, stirring constantly, until mixture comes to a boil.  Lower heat and cook slowly for three minutes, stirring constantly.  Remove from heat and quickly stir in peanuts and vanilla.  Beat until candy thickens and begins to lose its gloss.  Drop from teaspoon onto waxed paper, forming into clusters.

Candy1I began by combining the pudding mix, sugar and butter into my saucepan.

Candy2Then I added the evaporated milk.

Candy3I whisked everything together on a medium heat and brought it to a boil.  Then lowered the heat and continued to stir it for three minutes.

Candy4After the timer went off, I pulled it off of the heat and added the vanilla and salted peanuts.

Candy5It was looking delicious!  I stirred it until it started to thicken.

Candy7I dropped it by teaspoonfuls onto waxed paper (I sprayed it with cooking spray, just incase.) that I had spread out before I began.

Candy11
I let them cool on the wax paper for a couple of hours.  As they cooled, they harded and I was able to peel them off of the waxed paper.

Chocolate Peanut Clusters are an easy homemade candy to make.  It tastes like fudge!  I hope you’ll enjoy making them for your loved ones, as much as I know Grandma Dora enjoyed making them for my Grandpa.

Happy Cooking and Happy Valentine’s Day!

Wendy

Sugar Cookies – A Bonus Recipe

Cookies 073 Wendy and I realized something the other day.  We never made “Christmas cookies” over Christmas.  We made lots of cookies, but for some reason (maybe it had to with family members taking turns being sick through most of the season and therefore never having time), we never made the traditional roll out, cut into shapes and frost kind of Christmas cookies.  So, we decided we definitely needed to make Valentine cookies this year.  One day when she and my nephews were over, we pulled up our sleeves and started in on some fun. Cookies 072 I always like to pull this recipe out for roll out sugar cookies.  I actually got it in junior high or high school in a home economics class.  I remember very little about those classes, but I have always kept this recipe.  I remember one time when our neighbor who had moved away came back for a visit.  I was always making these cookies when I first got this recipe and so I made them for her.  She took one bite and said, “These are just like cookies from a bakery!”  I’ve never forgotten she said that and I always think fondly of her (and her comment) when I make this recipe. Cookies 066 Sugar Cookies

  • 2/3 cup shortening
  • 3/4 cup granulated sugar
  • 1 teaspoon vanilla
  • 1 egg
  • 4 teaspoons milk
  • 2 cups sifted all-purpose flour
  • 1 1/2 teaspoons baking powder
  • 1/4 teaspoon salt

Thoroughly cream shortening, sugar and vanilla.  Add egg;  beat until light and fluffy.  Stir in milk.  Sift together dry ingredients.  Blend into creamed mixture.  Divide dough in half.  Chill 1 hour.  On lightly floured surface, roll to 1/8 inch thickness.  Cut in desired shapes with cutters.  Bake on greased cookie sheet at 375 degrees about 6-8 minutes.  Cool slightly;  remove from pan.  Makes 2 dozen. Cookies 001 To begin, I put the shortening, sugar and vanilla in the KitchenAid. Cookies 002 I creamed the three ingredients. Cookies 003 I then added the egg (I actually doubled the recipe, so I had two). Cookies 004 I beat the ingredients until they were light and fluffy.  I then stirred in the milk. Cookies 005 Next I combined the dry ingredients and blended them into the creamed mixture.  I chilled the dough for an hour or more. Cookies 008 Then, with the help of my nephews and sister, we rolled out the dough and began cutting shapes. Cookies 011 We baked the cookies at 375 degrees for 6-8 minutes.  They always smell so good when they are baking. Cookies 076 Next came the fun of frosting and decorating.  My sister had brought her collection of sprinkles, so we all had fun putting our own finishing touches on our cookies.

Cookies 026

My nephews wanted to decorate the snowflake cookies.

Cookies 025

They were very generous with the sprinkles!

Cookies 075 This is a recipe I highly recommend.  You just can’t go wrong with these.  So, pull your family together and have some festive Valentine’s Day fun together! Cookies 074 Happy Baking! Amy Cookies 053 Cookies 054 Cookies 055 Cookies 052 Cookies 034 Cookies 044 Cookies 048 Cookies 043

Hawaiian Sheet Cake – A Bonus Recipe

P Cake

We’ve been getting pounded with snow in Michigan.  I do love it, but at times I think about warmer weather and what it would be like just to have a little break from the cold snow, to enjoy the sun, just for a little while.  Maybe in….Hawaii?!

When my husband was growing up, his Uncle was in the army.  He was stationed in Hawaii for about six years.  During that time, my husband’s family took a once in a lifetime trip and went to visit.  For a week, amongst many other things, they got to swim on the secluded beaches that were for military only, they hiked and explored the natural wonders of the islands and even toured the Dole Pineapple Factory.  He said he’ll never forget that trip, all the adventures, the way he remembers them as a nine-year old boy.

This recipe came from that trip to Hawaii.  My husband’s Grandmother and his mother made this recipe for years.  It was such a favorite of my husband’s that he actually chose it as the groom cake at our wedding.

Hawaiian Sheet Cake

Cake

  • 1 large can of crushed pineapple, with juice
  • 1 stick butter, melted
  • 2 cups sugar
  • 2 eggs
  • 1 tsp. vanilla
  • 2 1/2 cups flour
  • 1 tsp soda
  • 1 tsp salt (scant)
  • 1/2 cup sour cream

Frosting

  • 1/3 cup milk
  • 1 stick butter
  • 1 box powdered sugar (4 cups)
  • 1/2 cup or more chopped nut meats (macadamia preferred)

For Cake: Heat crushed pineapple with juice and stick of butter.  Remove from heat.  Add sugar and beat in eggs, one at a time.  Stir in vanilla.  Beat in flour, soda and salt.  Stir in sour cream.  Pour into a prepared cookie sheet and bake at 350 for 20 minutes or until golden brown.

For Frosting:  Add milk and butter to saucepan.  Bring to a boil.  Remove from heat and add 1 box powdered sugar.  Spread onto cake when still warm.  Top with nuts.

Melted butter and pineappleI started out by melting 1 stick of butter and the crushed pineapple on the stove top.

Pineapple and sugarI removed it from the heat and whisked in the sugar.

Pineapple butter and eggsThen I added the eggs, one at a time, and the vanilla.

Dry ingredientsI then added all of the dry ingredients.  Once they were incorporated, I mixed in the sour cream.

BatterIt was ready to be poured into the greased cookie sheet and go into the oven.

BakedI baked it for 20 minutes at 350 degrees.  The edges were just beginning to brown and my toothpick came out clean so I pulled it out of the oven.

P - Frosting1While the cake was cooling, I began preparing the frosting.  I added milk and butter to my saucepan and brought it to a boil.

P - Frosting2Then I pulled it off the heat and slowly started adding the powdered sugar.  The recipe calls for a “box” of powdered sugar.  I looked it up and the equivalent was 4 cups, so that’s what I put in.

P Frosting3It made a nice thick frosting.  I made sure to put it on the cake while it was still warm so that it would spread easily.

P - WalnutsThe last thing that needed to be added was the nuts.  While the recipe suggests macadamia nuts, it was always served with walnuts at our family functions, so that’s what I used.  Any kind would be fine.  I cut them into pieces and sprinkled them on.

P SliceIt’s a deliciously moist and elegant cake.  One that serves a crowd!

HSCSo if you’re wishing for a little taste of warmer weather, turn your Pandora radio onto tropical, ukulele music.  Jack up your thermostat and put on your grass skirt.  Whip up a Hawaiian Sheet Cake and “get away” from the cold and snow for just a little while!

Happy Baking!

Wendy

Ham and Cheese Whirls – A Bonus Recipe

Ham and Cheese Whirls 047

The Superbowl is coming and it is snack food time!  Our family always has a little party featuring our favorite snacks.  Wendy usually makes my favorite, Mexican Layered Dip.  And, her husband, who is a great cook, makes a variety of good snacks.  I usually add some dishes of my own and it is a lot of fun.

Ham and Cheese Whirls 048

Last Saturday, after going on another hike in the snowy woods, we came back hungry and decided to make Ham and Cheese Whirls.  We were talking about what a great Superbowl snack they would be.  The recipe is actually, from our older sister, Rebekah.  Everyone worked together, and we had these delicious treats on the table in no time.

Ham and Cheese Whirls

Biscuit: (or substitute 1 loaf frozen bread dough, thawed)

  • 2 cups flour
  • 1 tablespoon baking powder
  • 2 teaspoons sugar
  • 1/2 teaspoon salt
  • 1/2 cup butter
  • 3/4 cup milk

Filling:

  • 2 cups shredded cheddar cheese
  • 1 cup finely chopped cooked ham
  • 1/4 cup finely chopped celery
  • 1/4 cup mayonnaise

To make biscuit:  Mix dry ingredients.  Then add milk slowly.

For filling:  Mix cheese, ham, celery and mayonnaise.

Roll out biscuit into a rectangular shape.  Spread on filling.  Roll up and cut into rolls on greased pan.

Bake at 375 degrees for 15 minutes or until golden brown.

Ham and Cheese Whirls 001

First we put the dry ingredients into the Kitchenaid. (You could also use frozen bread dough, or make up some bread dough in your bread machine.)

Ham and Cheese Whirls 010

Next we added the milk slowly and mixed until it formed a soft dough.

Ham and Cheese Whirls 011We put the dough out on the floured counter top.

Ham and Cheese Whirls 012We rolled out the dough into a rectangular shape (We doubled the dough since there were a lot of us eating, so it was bigger than one batch would look.).

Ham and Cheese Whirls 013While some of us were making the dough, others were shredding the cheese,

Ham and Cheese Whirls 002cutting up the celery,

Ham and Cheese Whirls 009and dicing the ham.

Ham and Cheese Whirls 014We mixed those three ingredients together along with the mayonnaise to create the filling.

Ham and Cheese Whirls 015Next, we spread the filling all over the rolled out dough.

Ham and Cheese Whirls 016Then it was time to carefully roll the dough up like you would cinnamon rolls.

Ham and Cheese Whirls 017Once it was all rolled, it was time to cut it into rolls.

Ham and Cheese Whirls 019We used a piece of floss to cut the rolls.

Ham and Cheese Whirls 020The floss keeps the dough from getting smashed like it might if using a knife.

Ham and Cheese Whirls 021

When the rolls were cut, they were placed on a cookie sheet.  We put them in the oven for about 15 minutes at 375 degrees.  My nephew thought they looked so good that he wanted to try one before we cooked it!

Ham and Cheese Whirls 032I think the cooking was worth his wait because they came out of the oven golden and bubbly.

Ham and Cheese Whirls 042I’m glad we made a double batch because we all liked them!

Ham and Cheese Whirls 044Ham and cheese whirls are a dish I definitely recommend for your Superbowl Party.  Give them a try and let us know what you think!

Happy Baking!

Amy

Blueberry Banana Bread – A Bonus Recipe

blueberry banana bread 011

Did you go blueberry picking last summer?  We did.  It is one of our favorite summer outings.  We love to be out in the sunny field with the blueberry bushes all around us.  My nephews are good pickers (although they like to spend some of their time trying to pelt us with unripe blueberries – they learned this game from their dad and uncle) and so between all of the adults and kids we usually pick a large amount of berries.  I love bringing them home, pouring them into zip lock bags and packing them safely away in the freezer for winter days like today.

blueberry banana bread 013

Today just seemed like a good day to bake with blueberries.  So, I found this recipe, compliments of one of the blueberry farms we sometimes visit, and got to work.

blueberry banana bread 014

Blueberry Banana Bread

  • 1 cup blueberries
  • 1 3/4 cups flour
  • 2 teaspoons baking powder
  • 1/4 teaspoon baking soda
  • 1/2 teaspoon salt
  • 1/3 cup butter or margarine
  • 2/3 cup sugar
  • 2 eggs
  • 1 cups mashed, ripe bananas

Wash and thoroughly drain blueberries;  toss berries with 2 tablespoons flour.  Sift together remaining flour, baking powder, soda and salt.  Cream butter or margarine;  gradually beat in sugar until light and fluffy.  Beat in eggs, one at a time.  Add flour mixture and bananas alternately, in three parts.  Stir in blueberries.  Spoon into greased loaf pan (9x5x3 inches).  Bake in 350 degree oven about 50 minutes or until done.  Makes 1 loaf.

blueberry banana bread 003

I pulled the blueberries out of the freezer and washed them thoroughly.

blueberry banana bread 004

I then tossed them in 2 tablespoons of flour and set them aside.

blueberry banana bread 006

Next, I stirred together the dry ingredients with a whisk.

blueberry banana bread 001

I then creamed the butter and then gradually added the sugar.

blueberry banana bread 002

Next came the eggs and the batter became very light, almost foamy.

blueberry banana bread 005

When bananas are starting to get too ripe, I like to peel them and stick them in a ziploc bag in the freezer.  I can then pull them out for baking.  So, I pulled a couple of bananas out of the freezer, thawed them a little and then mashed them a bit (I know, it does not look appetizing!).

blueberry banana bread 007

I added the flour mixture to the batter alternately with the bananas.

blueberry banana bread 008

I then stirred in the blueberries.

blueberry banana bread 009

Then, it all went in the bread pan and into the oven at 350 degrees for about 50-60 minutes.

blueberry banana bread 012

It came out looking and smelling delicious!  This blueberry banana bread is a special treat from a special summer memory!

Happy Baking!

Amy

Butterscotch Cookies

Grandpa and Grandpa Wichterman and Kado

My grandparents and their dog on a walk.

My dad told me a story about a summer day when he was about 7 or 8 years old.  He wanted his mom to go for a walk with him over to the 80 acres of land they owned (this land was separate from their farm – down the road, so he couldn’t go there by himself).  She was swamped with kitchen and garden work that day (as she often was).  He kept begging her to go for a walk and she kept resisting as she knew she had so much to get done.  But finally, she agreed to go.  They walked for about an hour down the lane and past the pond.  They picked flowers and spent the time together.  My dad still remembers this as an example of how kind and caring his mom was.  She gave him the gift of her time when it cost her to give it.

Cookies 088

I found this recipe for butterscotch cookies in Grandma Dora’s recipe box.  It appears to have been cut out from a newspaper.  My grandma also sacrificed her time by making all kinds of sweets for her family when she had other work to get done.  My dad and uncle probably ate many of these along with the other treats their mom continually made them.

Cookies 083

Butterscotch Cookies

  • 4 cups sifted enriched flour
  • 1 teaspoon soda
  • 1 teaspoon cream of tartar
  • 1/2 teaspoon salt
  • 1 cup butter or margarine
  • 2 cups brown sugar
  • 2 eggs
  • 1 teaspoon vanilla extract
  • 1 cup chopped nuts

Sift together flour, soda, cream of tartar and salt.  Cream together butter or margarine and sugar until light and fluffy.  Add eggs and vanilla extract.  Beat well.  Add flour mixture to creamed mixture.  Add nuts and mix well.  Shape into rolls and wrap in wax paper or press into cookie molds.  Chill until very firm.  Slice thin and bake on ungreased baking sheets in moderately hot oven (400 degrees F) 8 to 10 minutes.  Yield:  about 6 dozen 2-inch cookies.

Cookies 077

These cookies were pretty simple to make.  First, I stirred the flour, soda, cream of tartar and salt together with a whisk.

Cookies 078

Then I creamed the butter and sugar together.

Cookies 079

Next, I add the eggs and vanilla.

Cookies 080

The flour mixture was put in next and then the nuts (I used walnuts).

Cookies 081

I took the dough and made it into a roll (I made half a recipe, so I only made one roll.  If you make the whole recipe, you would probably want to make two rolls.).

Cookies 082

I then wrapped it in wax paper and refrigerated it for a couple of hours.

Cookies 084

I cut them, and put them on ungreased baking sheets.

Cookies 086

I baked them in a 400 degree oven.  The recipe said to bake them for 8-10 minutes.  I found that 6-7 minutes was long enough.

Cookies 101

These cookies turned out delicate, crisp and delicious!  Everyone who ate them raved about them!  I was very happy with how they turned out!  I hope you give them a try!

Happy Baking!  Amy

Peanut Butter Chocolate Chip Cookies – A Bonus Recipe

Grandma and Becky

Grandma Dora pulling my sister in a wagon on a snowy day. Maybe she couldn’t resist being out in the snow either.

The snow is perfect right now.  It has been for days and I can’t seem to keep myself from going outside.  I know I have work to do inside, but when I look out at the snow sparkling in the sunlight, I just can’t resist.  I’ve been cross country skiing or sledding with my friends and family (and even by myself when no one else was available to go) almost every day this week.

So, I honestly haven’t taken a lot of time to bake this week, but when I did bake, I decided to go with my all time favorite.  I’ve made a lot of cookies in my day.  In fact, I’ve made a lot of chocolate chip cookies.  But, this is the one cookie recipe that I always come back to.  It is simply the best.  How could you go wrong with the combination of chocolate, peanut butter and oatmeal?  Well, I’ll tell you – you can’t go wrong.  Just like the snow that’s on the ground right now, it’s perfect.

pb chocolate chip cookies 119

My sister and my nephews are coming over today while my brother-in-law goes with some of his friends to the car show in Detroit.  I decided I would make them some chocolate chip cookies for a treat when they came.  But, not just any chocolate chip cookies – peanut butter chocolate chip cookies!

pb chocolate chip cookies 126

Peanut Butter Chocolate Chip Cookies

  • 1/2 cup butter or margarine softened
  • 1/2 cup sugar
  • 1/3 cup packed brown sugar
  • 1/2 cup chunky peanut butter
  • 1 egg
  • 1 teaspoon vanilla extract
  • 1 cup all-purpose flour
  • 1/2 cup old-fashioned oats
  • 1 teaspoon baking soda
  • 1/4 teaspoon salt
  • 1 cup (6 ounces) semisweet chocolate chips

In a mixing bowl, cream butter and sugars;  beat in peanut butter, egg and vanilla.  Combine flour, oats, baking soda and salt;  stir into the creamed mixture.  Stir in chocolate chips.  Drop by rounded tablespoonfuls onto ungreased baking sheets.  Bake at 350 degrees for 10-12 minutes or until golden brown.  Cool 1 minute before removing to a wire rack.  Yield:  2 dozen.

pb chocolate chip cookies 104

First I creamed the butter and sugar together.

pb chocolate chip cookies 105

Then I beat in the peanut butter, egg and vanilla.

pb chocolate chip cookies 106

Next, I combined the flour, oatmeal, baking soda and salt.  (My sister likes to blend up the oatmeal before she adds it.  It changes the texture and is very good too.)

pb chocolate chip cookies 107

I stirred the dry ingredients into the wet ingredients until I had a nice cookie dough.

pb chocolate chip cookies 108

Next came the chocolate chips.  Doesn’t it look good enough to eat?

pb chocolate chip cookies 110

After that I rolled it into balls and put it on the cookie sheets.

pb chocolate chip cookies 113

I baked them at 350 degrees for 10-12 minutes.  They turned a lovely golden brown.  I cooled them for a minute, then moved them onto a wire rack.  They smelled delicious!

pb chocolate chip cookies 115

I’m sure that when my sister and nephews get here, I’ll try to coax them outside to play in the snow.  And, maybe when we come inside all wet and cold and happy, we’ll have a snack of milk and peanut butter chocolate chip cookies.  You just can’t go wrong with these cookies.  They are simply the best of the best!  You really have to try them!

Happy Baking!

Amy

White Nut Bread

On Sunday afternoons, after church, we often go over to my parent’s house for lunch.  I always try to bring something to share, to help with the meal.  I found a recipe in my Grandma Dora’s recipe box for White Nut Bread.  I decided to make it because it seemed like a simple, easy recipe and something we could all enjoy with lunch.  When we got to my parent’s house on Sunday, I set the bread on the kitchen counter and began to help get the meal going and on the table.  As my dad looked at the loaf of bread I had set down, he said, “I remember that my mom used to make a nut and raisin bread that kind of looked like that.  She made it a lot and I always liked it.”  He didn’t know that I had actually found and made her recipe.  I said, “This IS your mom’s recipe!  I got it from her recipe box!  This is her recipe for White Nut Bread!”  I was so pleased that what I had made looked like and reminded him of Grandma Dora’s!  He said it was really good and tasted the way he remembered it!

NB - Recipe2
White Nut Bread

  • 2 1/2 cups flour
  • 2 1/2 teaspoons baking powder
  • 1/2 cup sugar
  • 1/2 teaspoon salt
  • 1 cup milk
  • 1 egg, beaten
  • 1/2 cup raisins
  • 1/2 cup nuts (or more as desired)

Mix together all dry ingredients.  Add nut meats and raisins.  Mix in milk and the beaten egg.  Put batter into a greased loaf pan.  Let rise 1/2 hour.  Bake at 350 degrees for 45-50 minutes or until an inserted toothpick comes out clean.

NB - Dry IngredientsI began by mixing together the dry ingredients.

NB - Nuts and Raisins

Then, after chopping up the nuts (I used walnuts) I added them to the dry ingredients with the raisins.  I actually used a full cup of chopped walnuts.

NB - Wet Ingredients AddedOnce the nuts and raisins were mixed in, I added and blended in the milk and beaten egg.

NB - In loaf panI poured the batter, which was very thick, into a greased loaf pan.  I covered it and let it rise for 30 minutes before putting it into my preheated oven.

NB Baked
I baked the White Nut bread for about 50 minutes.  It was a beautiful golden brown loaf.  This recipe has very little sugar in it, only a half cup, so because I didn’t think the bread itself would be very sweet, I decided to add some frosting!!

NB - Frosted1I made a thick glaze of powdered sugar and milk and put it on the loaf while it was still slightly warm.

NB - Frosted and Sliced

Nothing makes a loaf of bread better than thick frosting!

NB - Frosted and Sliced3The bread had a nice, chewy outside and a delicious, soft inside!  The sweet raisins and frosting were a nice compliment to the nutty flavor of the walnuts.

NB - Fosted and Sliced2My family really enjoyed the White Nut Bread along with our Sunday lunch.  I was glad I had made it and that it turned out to be such a delicious recipe, one that reminded my dad of his childhood!

Happy Baking!

Wendy

Biscuits

My parents have a cherry table stored in their basement.  It belonged to my Grandpa and Grandma Dora.  It’s a beautiful, solid table, with lots of carved wood and intricate patterns. It has numerous leaves that fit into it, making it enormous in length.  I’ve always admired it and said that someday I hoped it would be mine.  My dad has told stories that during harvest time he can remember that cherry table, with all of the leaves in it, stretched out in their house with a large group of farm hands eating around it.  Farmers in the area would go together, farm to farm, helping neighbors bring in their crops, living by the adage, “Many hands make light work.”  When they would come to my grandparents farm, Grandma Dora, her mother Edith and the wives of the men in the fields would spend hours cooking and baking, trying their best to fill the men up with a hearty meal before sending them back out to the fields.

Grandpa on Hay Wagon

Grandpa on his hay wagon that was used during harvest time.

I found Grandma Dora’s recipe for homemade biscuits in her recipe box.  I’m sure she included them with the filling meals for the farm hands.  I had never made biscuits from scratch before.  Normally when I see a recipe that requires a rolling pin, I usually lose interest pretty fast.  But I had a recipe in my own recipe box for Creamed Chicken Over Biscuits that I had never made, but always intended to, so this was my chance.  I would whip this up for dinner!

Biscuit RecipeBiscuits

  • 3 cups flour
  • 1/4 teaspoon salt
  • 1/4 teaspoon soda
  • 2 teaspoons baking powder
  • About 1 1/2 cups buttermilk
  • 4 Tablespoons lard (or shortening)

Combine all dry ingredients in mixing bowl.  Add buttermilk and shortening.  Mix until soft dough is formed.  On a floured surface, knead a few times and roll out until dough is about 1/2 inch in thickness.  Cut with a floured biscuit cutter.  Place on ungreased baking sheet.  Bake at 450 for 10-12 minutes or until golden brown.

Biscuits dry ingI added all of the dry ingredients into my mixing bowl.

Biscuitswet combinedNext, I added the buttermilk and shortening.  (If you don’t have buttermilk and would like to make your own, we explain how in the recipe for Mrs. Magary’s Spice Cake.)

Biscuits DoughUsing the dough hook attachment on my Kitchenaid (though just a regular mixer attachment would be fine), I mixed the ingredients until a soft dough formed.

Biscuits Dough BallAfter flouring the counter, I kneaded the dough a few times until it felt like a good consistency for rolling out.

Biscuits Rolled OutI rolled out the dough until it was about 1/2 inch thick.  If you’d like a thicker biscuit, than don’t roll it quite as thin.

Biscuits CutSince I don’t have a biscuit cutter, I floured the mouth of a glass jar and used that to cut the dough.  I then placed them on an ungreased baking sheet and popped them into my preheated oven.

Biscuits BakedI baked them for about 12 minutes and pulled them out as they were starting to brown and open around the middles.

Biscuits Piled2They were beautiful!  Soft and flakey, splitting in the middle.  They even smelled delicious!

Biscuits Piled3I couldn’t wait to try them with dinner.  I covered them to keep them warm and made the Creamed Chicken, which is basically like the inside of chicken pot pie.

Biscuits ServedThe biscuits were delicious!  They were cut open and covered with heaping ladles of steaming Creamed Chicken.  It was a warm, hearty meal, one that reminded me of something that Grandma Dora must have prepared for the farm hands all those years ago.

Happy Baking!

Wendy